
You deploy a website to Firebase Hosting in four steps. Install the Firebase CLI, run firebase login, then run firebase init hosting inside your project folder. Finish with firebase deploy --only hosting. Firebase uploads your files and gives you a live URL within a minute, at no cost for a small site. The rest of this guide walks through each step, including the parts most beginners get stuck on.
Firebase Hosting is Google's service for serving static files and single-page apps such as a React build. Use it once you have finished a site or a front-end project and want a real, shareable URL. That beats leaving the file on your laptop.
What you need before you start
Install Node.js if you plan to use the npm install method below. Download the current LTS release from nodejs.org. At the time of writing that is Node 24, with Node 26 as the newer "Current" release. You also need a Google account, since you create and manage Firebase projects through the Firebase console with that login.
Install the Firebase CLI
The Firebase command-line tool, firebase-tools, has three install paths. Which one suits you depends on whether you already have Node.js and which operating system you use. The firebase-tools README lists all three.
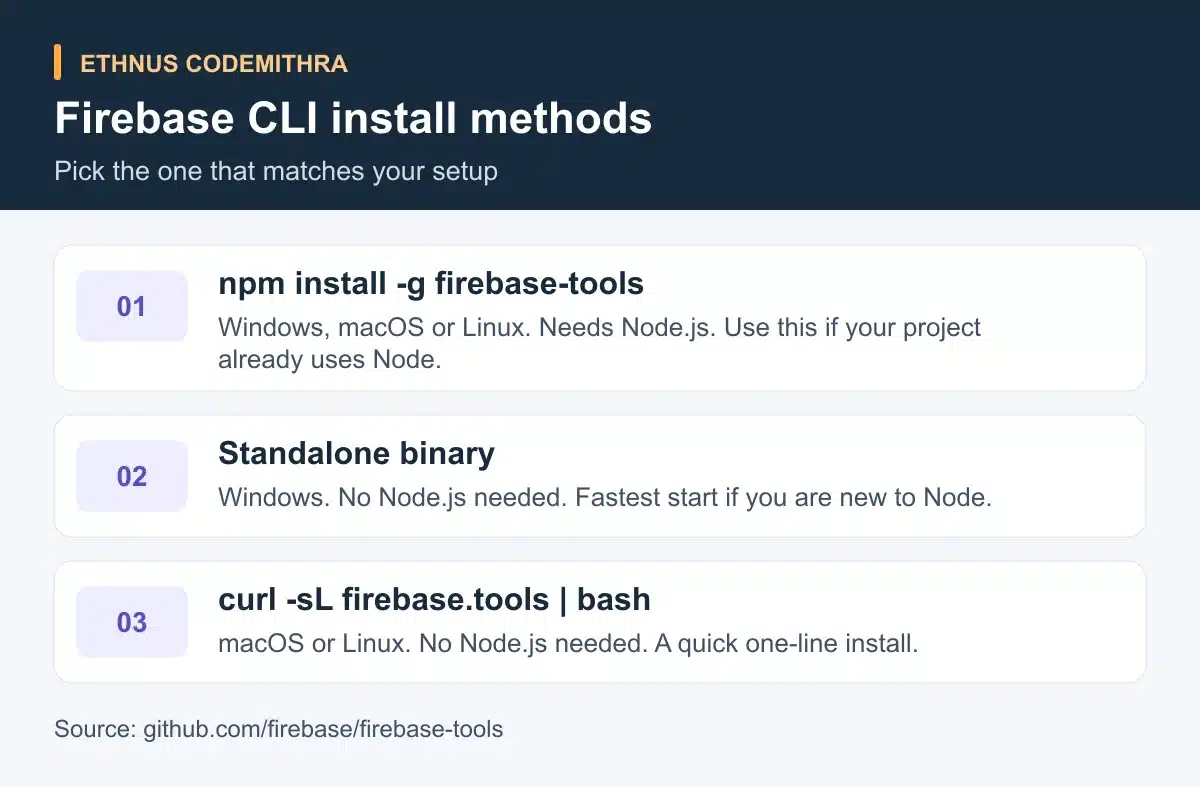
If you already use Node.js for your project, install the CLI as a global npm package:
npm install -g firebase-toolsOn macOS or Linux, skip Node.js entirely with the standalone installer script:
curl -sL firebase.tools | bashWindows also has a standalone binary that needs no prior Node.js install. The full options, including that binary, are listed on the official Firebase CLI reference. Link there rather than to a fixed download URL, since the exact binary location can change.
Log in and initialize hosting
Open a terminal and change into your project folder. Then run:
firebase loginThis opens a browser window so you can sign in with the Google account you want for this project. Next, start the hosting setup from your project root:
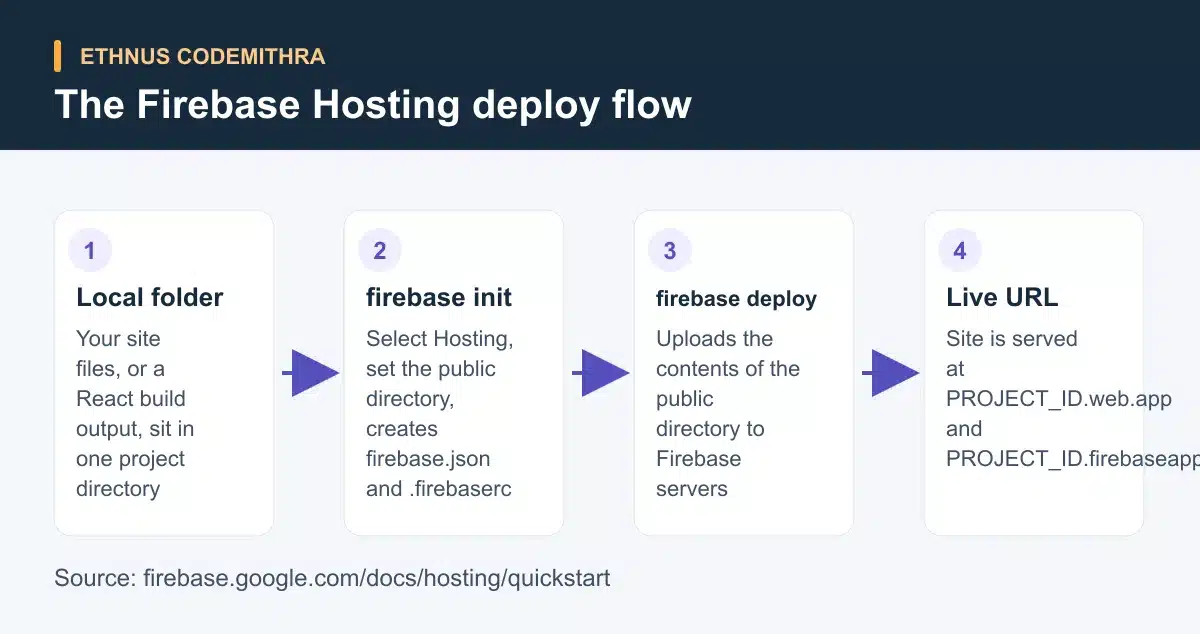
firebase init hostingThis asks three questions, confirmed on the official Firebase Hosting quickstart. Which Firebase project to use, whether a new one or an existing one. Which folder holds the files you want to deploy, called the public directory and defaulting to public. Whether the project is a single-page app.
Once you answer these, the CLI creates three things in your project folder if they are not already there. It writes a firebase.json configuration file and a .firebaserc file that records which Firebase project you linked. It also creates the public directory itself, with a starter index.html and 404.html if that folder was empty.
Understand firebase.json
The old version of this guide stopped at firebase init and never explained the file it creates. That file controls what actually gets deployed, so read it before your first deploy. A minimal example, matching the defaults in the Firebase Hosting configuration reference, looks like this:
{
  "hosting": {
    "public": "public",
    "ignore": [
      "firebase.json",
      "**/.*",
      "**/node_modules/**"
    ],
    "rewrites": [
      {
        "source": "**",
        "destination": "/index.html"
      }
    ]
  }
}
The public field names the directory whose contents get uploaded, and it defaults to public. The ignore array excludes files you never want uploaded. By default that already covers firebase.json itself, dotfiles and your node_modules folder, so you do not need to add those yourself.
The rewrites block is the part most beginners never see until something breaks. Without it, a single-page app built with React works fine on the homepage. But it shows a blank page or a 404 when a visitor refreshes any other route, such as /dashboard. Adding the rule shown above tells Firebase to serve index.html for any path it does not recognise, so your app's own router can take over. The rewrites section of the same reference documents this. It did not exist anywhere in the previous version of this article.
Deploy your site
With firebase.json in place and your files in the public directory, deploy with:
firebase deploy --only hostingScoping the command to --only hosting avoids touching other Firebase products you might add later, such as Firestore or Functions. Once the upload finishes, the CLI prints a live URL. Every hosting project gets two default domains, confirmed on the same quickstart page: PROJECT_ID.web.app and PROJECT_ID.firebaseapp.com. Both serve the same content.
You are not stuck with the default domains. A custom domain and free SSL certificate come with Firebase's free Spark plan, confirmed on the Firebase pricing page. You can point your own domain at the same hosted site later, without upgrading.
The free tier, and when you would pay
Checked against the official Firebase documentation on 8 September 2026: the no-cost Spark plan includes hosting storage up to 10 GB. It also includes data transfer from Firebase's servers to visitors up to 10 GB a month. Both figures come from the usage, quotas and pricing page. That number has changed over the years, and some older blog posts still quote a much smaller daily limit. Check the official page rather than a cached figure if you need it again later.
If a site goes over the free transfer quota in a given month, Firebase disables it until the quota resets. The only way around that is to upgrade to the pay-as-you-go Blaze plan first. For a personal project, portfolio site or class assignment, the free tier is normally enough.
Try it yourself
Before you deploy a real project, run this exercise on a throwaway folder. Create a folder with one index.html file and run firebase init hosting. Answer "yes" to the single-page-app prompt even though this is not one, then deploy. Visit the live URL, edit a line in index.html, and deploy again. Watching the same URL update on the second deploy confirms you understand the loop, before you deploy a project you actually care about.
Where this fits into the MERN Full Stack course
Deploying a working URL is usually the last step of a front-end project, not the first thing you learn. That is why it appears late in a full-stack syllabus rather than at the start. Ethnus's MERN Full Stack course lists "Deploying React App to the Web" as an item in its React module. The course also has a dedicated NodeJS section covering setup, npm and building a web server. If you build a React project during the course, this Firebase Hosting walkthrough is one direct way to put it on a real URL. Step-by-step walkthroughs and doubt-clearing support are available if you get stuck on a step.
Common first-deploy problem
Suppose your site works on the root URL but shows a blank page or a 404 after a refresh on any other route. You almost certainly skipped the rewrites block covered earlier. Add it to firebase.json and run firebase deploy --only hosting again. This single setting resolves the most common complaint from anyone hosting a single-page app on Firebase for the first time.
Frequently asked questions
Do I need to know Node.js to use Firebase Hosting?
No. You need Node.js only if you choose the npm install path for the CLI. The standalone binary for Windows and the curl script for macOS and Linux both install the CLI without Node.js. See the firebase-tools README.
Is Firebase Hosting free?
The Spark plan hosts a site at no cost, up to 10 GB of storage and 10 GB of data transfer a month. That comes from the official pricing and quotas page. Going over the monthly transfer limit disables the site until it resets, unless you upgrade to the Blaze plan.
Why does my site 404 when I refresh a page that is not the homepage?
This happens to single-page apps that lack a rewrite rule. Add {"source": "**", "destination": "/index.html"} to the rewrites array in firebase.json. The Hosting configuration reference shows this rule, then redeploy.
Can I use my own domain instead of the firebaseapp.com address?
Yes. A custom domain with a free SSL certificate comes even with the no-cost Spark plan, confirmed on the Firebase pricing page.
If you want to build the kind of React project this guide is meant to deploy, Ethnus's MERN Full Stack course covers the front end, Node.js and the deployment step in one syllabus.